Showing posts with label Fabulous Fashions. Show all posts

Monday, 23 July 2012

DIY: How to Create Water Marbled Nails


I've been eying up the water marbling technique on fingernails for quite some time now! Like a lot of nail designs, I thought... hmmm, only in the salon am I going to get this look... WRONG!!! You can actually do it at home, using inexpensive nail polishes... look at that, saving money!! Boy, I'm getting good at this, I really think I should get a reward from my man for this, believe me, it's been hard!!!

When your marbleizing your nails, keep in mind that it will turn out different with each colour combination. Try it with different colours to see which look works the best for you! It's weird the difference in the swirls with the colour combos! You would be surprised!!

Just an FYI: This is going to take awhile. Because the nail polish dries rather quickly and you have to work pretty quick, you can only do one or two fingers at a time after you are done the base coats.
  

What you need:
Base Coat
White nail polish (or whatever colour you want underneath)
2 colors of your choice
Clear Top Coat

Tape
Cup full of room temperature water
Toothpick or woodstick
Q-tips or Cotton Swabs
Nail Polish Remover

What you do:
First you are going to apply your base coat. Apply a thin layer of your favourite base coat. Once your base coat is dry, apply two coats of your white (or whatever colour you want underneath) polish. Apply one coat, allow to dry, then apply another. The colors you choose to do the design with, will appear more vibrant by adding the two coats of white. I saw white because I like to do mine with white underneath, I haven't done it with any other colours yet, although I have seen lots of other nails with different vibrant colours! Ahhh can't wait to try different colours!!

Tape off the perimeter of your nails so that the polish wont seep onto your skin. If you want you can do one nail at a time, it's easier that way. Tape a nail, do the design, and then proceed to do the rest of your nails. It's hard to work with a bunch of taped up fingers, trust me!


Fill up a plastic cup or container with water that is room temperature. Open 2 nail polishes (or more, depending how many colours you want in your swirls, I recommend starting with less colours to get used to it). Grab your toothpick or wood stick and get it ready.

Start with one color and drop a drop of polish into the cup, dabbing the brush on the top of the water so a blob of polish spreads out really thin. It will look very sheer. Quickly take the next colour of polish and drop that into the center of the color you just dropped. Keep going back and forth between colours (or with different colours) until it looks like rings.

Remember: You MUST work quickly for this to work! The nail polish has to be wet for this to work. You might have to try it a few times before you get it right and figure out just how quickly you have to move. I quit the first time... I got discouraged big time... but the second time I picked it up I did it just fine! So if I can do it, you can do it!

Once you have the desired amount of polish take your toothpick and swirl it in the polish rings to create a cool design. Take your taped finger and quickly lay your finger down on the part of the design you like and then dip it in the water so that your whole nail is submerged.
 
While your nail is still in the water, take your toothpick and carefully clean the water by swirling the toothpick in it collecting all the extra polish. Pull out your nail and remove the tape. Clean up the edges of your fingers with a  q-tip or cotton swab. Allow your nail to dry for at least 4 minutes and then apply a top coat. Once done repeat on the rest of your nails. You obviously will find the best technique that works for you.


Like I said before... it does take patience (I'm surprised I can even sit through this... but my nails are one thing that I do have the patience for) and you might not get it on your first or second try... keep at it, you will. I promise!!! And the time it takes to do your nails is definitely worth the compliments you will get!

xOx - L

Click here to Like Designs & Decor on a Dime on Facebook.

DIY: Customized Makeup Brushes!!!


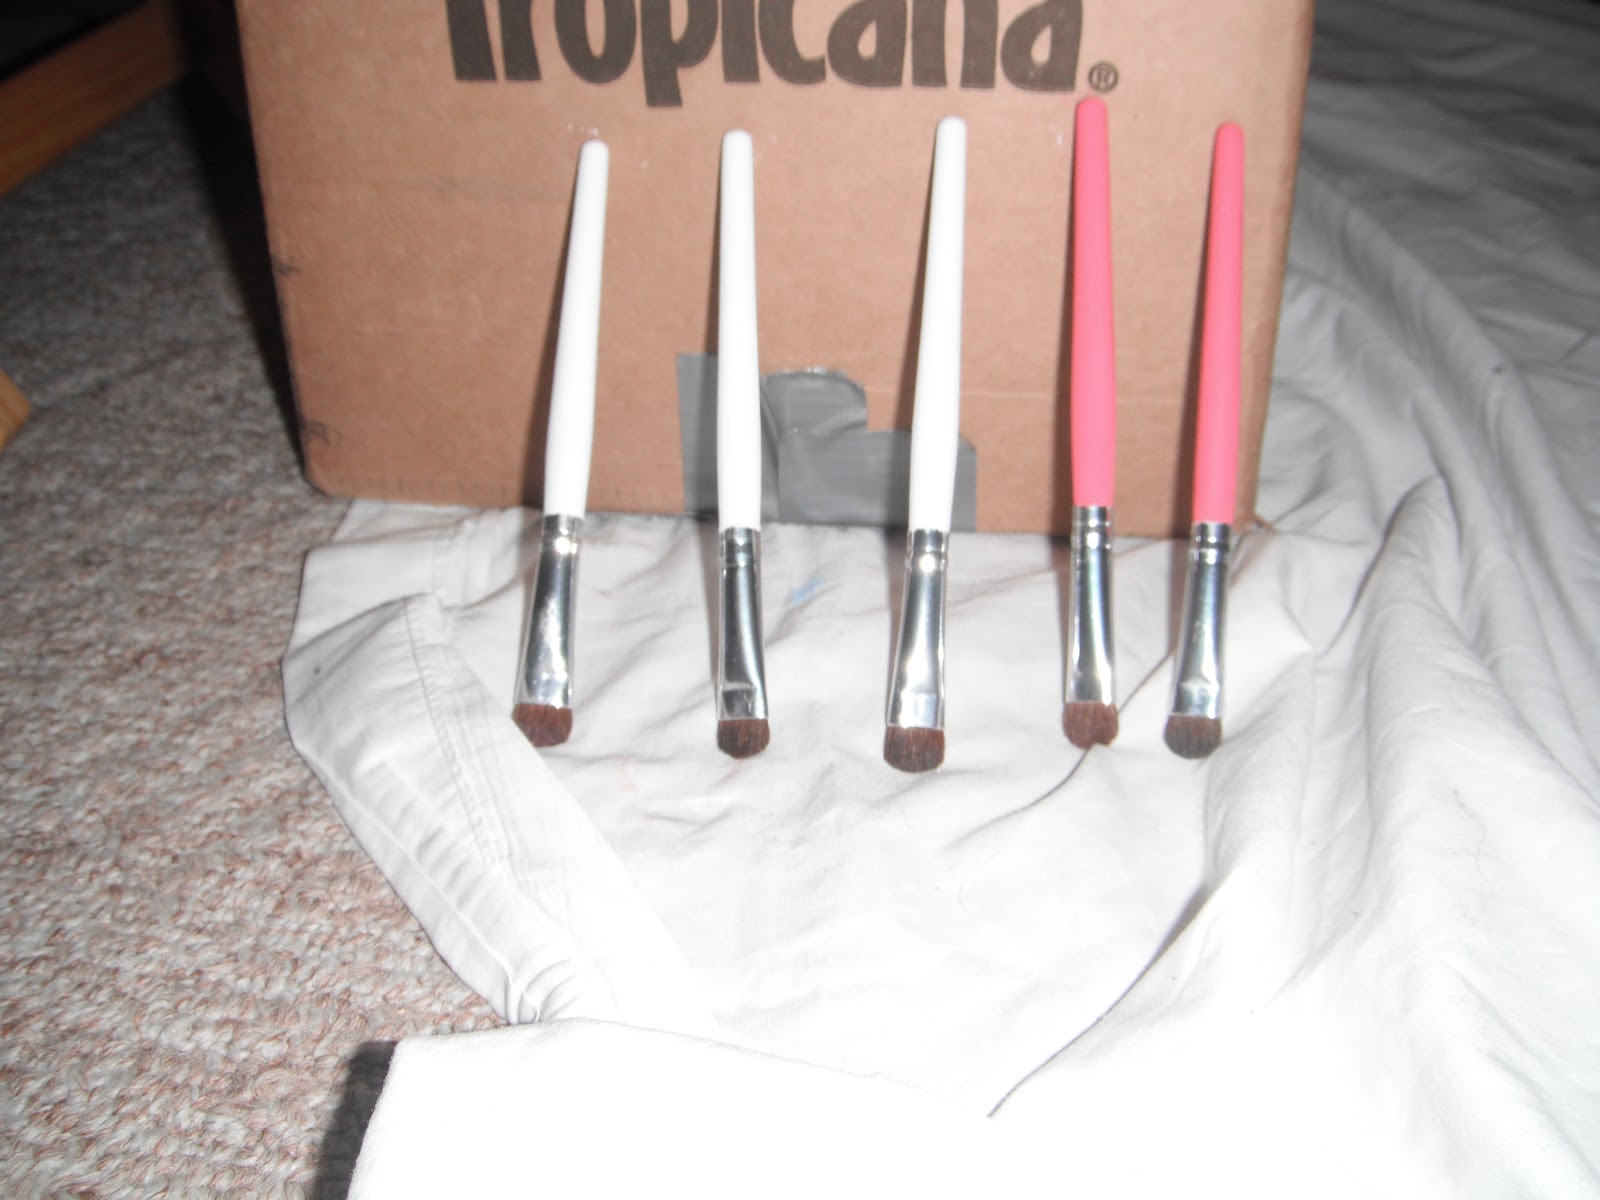
Feeling crafty and you just need to paint something? I get that urge... a lot! So I looked around the house in search of what I could find. I have a lot of makeup brushes... mostly for my eyes, a few bigger ones for blush. But I'm definitely an eye shadow kind of girl, always wearing different bright colours, resulting in having a few brushes, most of them being plain white. As you can see from the pics below, they aren't new... I just grabbed the brushes that I have now, they are good brushes that last awhile. And it's definitely time to dress these bad girls up!

I see a lot of awesome printed make up brushes in the store, but of course, they are rather expensive and something I won't spend a lot of money on. So lets just see what these hands can do!

I'm sure all your friends will ask where you bought 'em. :) They'll be asking you to make them some too after you tell them your little secret... You made them yourself! FYI: If you want to do this and you don't have brushes or if you are doing this for a gift for your bestie, the Dollarama has brushes and they work great!!

What you need:
Wooden Makeup Brushes
Sanding Block
Craft/Acrylic Paint
Paint Brushes

What you do:
Sand down the handles of the brush to roughen them up so the paint sticks to the surface better!


Paint on your base coat and let dry.


If your brushes need another coat, add a second!


Once your base coat(s) completely dry it's time to get creative and paint pretty designs on them! Or you can just leave them the one colour! Have fun with it! Be colourful or go for the black and white look!! I'm not the best free hander ... but I did it anyway! I was gonna get out the tape... but thought it a little too much if it's just for me!!


Definitely makes me like doing my makeup all the more better in the morning with my pretty new brushes! 

xOx - L

Click here to Like Designs & Decor on a Dime on Facebook.

Friday, 20 July 2012

DIY Bracelets... Made from Plastic Bottles


Like a lot of people, we can't drink our water. Well, we probably could BUT we don't! And I drink a lot of water. I have to get a new Brita, so in the mean time we have been buying bottles again... and they build up cuz I don't throw them in the garbage... but only get down to recycling every so often. So I started thinking of WTH I could do with them!

One being: Bracelets! My hands are quite tiny and so are my wrists so a normal size water bottle fits perfectly over my hand and on my wrist. For someone with a bigger wrist, use a bigger water bottle... that way, you can cut it down and size it to fit (I'll show ya how)!

Accessories are a huge part of ones outfit... they really can make... or break an outfit. But summertime is all about fun and bright colours... so, lets accessorize baby!

You Need:
Plastic bottle - Preferably a big one... unless you have tiny hands and wrists!!
Fabric
Buttons, Ribbons or Lace for decoration (if you like)
Duct Tape or Wide Masking or Painters Tape
X-acto Knife
Scissors
Hot Glue Gun


What you do:
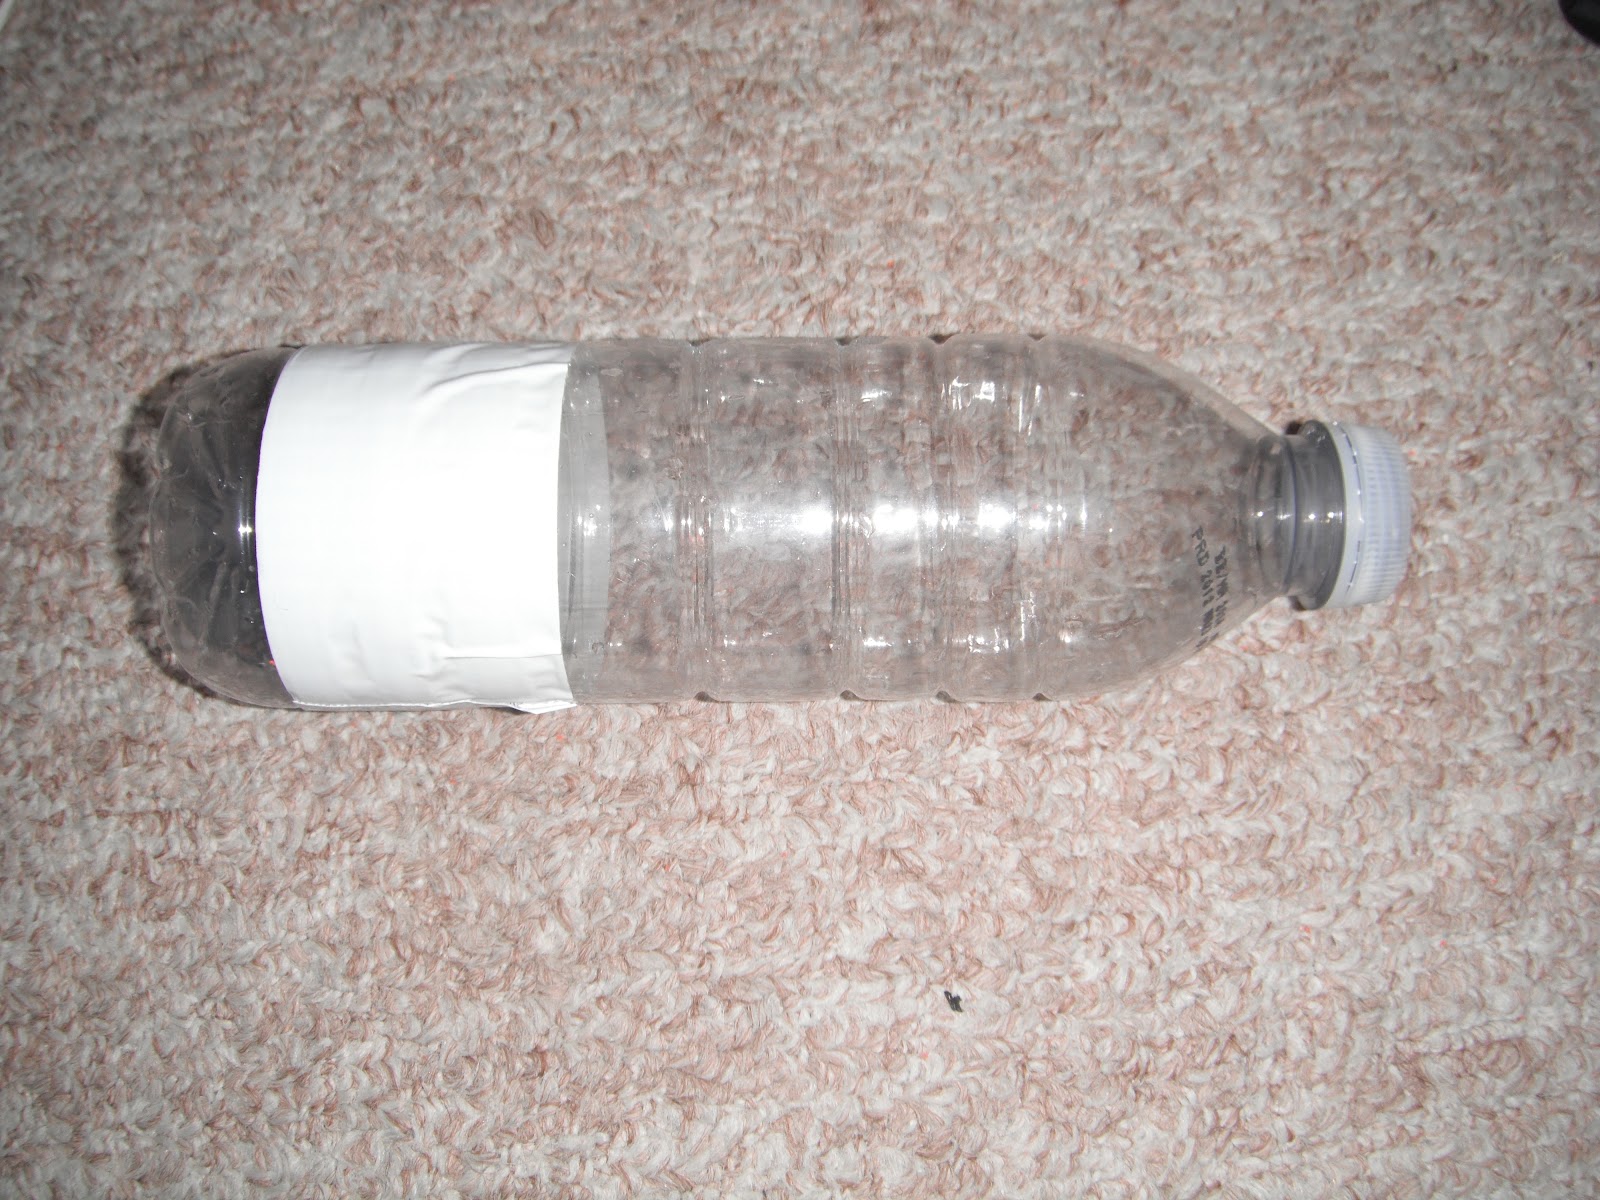
Take your duct tape and wrap it around the plastic bottle cutting it off when the ends meet.


Carefully cut into the bottle along the edges of the tape. Do this to both sides, cutting out the "bracelet".


If you have a small wrist and are using the small bottle, you can skip this next step. I'm using a small bottle this time, so there will be no pictures of this next part.

Put the bottle "bracelet" on your wrist. Too big? If so, which it most likely is since you are using a bigger bottle, then you are going to cut the plastic bracelet with scissors. Measure the desired size directly on your hand, cut the extra piece off and then secure the ends of the bracelet with the duct tape, making it a bracelet again... this time one that fits!

Now we are going to wrap the entire bracelet in duct tape two to three times. Making sure the edges are covered. This way, the bracelet won't melt from the glue... and the edges won't be sharp! I didn't cover the whole inside, just the edges.


If you are working with an elastic fabric, pull it gently in length stretching it before gluing. This way the edges curl and won't be seen. And it leaves a great texture for your bracelet!


Apply hot glue where the fabric is going to start to wrap around the bracelet. You don't need much glue. Stick the fabric down and press gently sticking the fabric, but making sure you don't squish the bottle!


Glue fabric down and wrap the bracelet with the fabric by going around and around the bracelet until it's covered.


Once you have wrapped the entire bracelet with fabric, apply glue to the bottle and glue the end piece of fabric down. Try to wrap the end around so it's inside the bracelet and can't be seen!


If you want to add lace, ribbons, buttons or anything else you have in mind... giver!


The great thing about a plastic bottle bracelet is ... you can get a few bracelets out of a bottle! So grab your fabric and a bottle and start to accessorize!!

xOx - L

Click here to Like Designs & Decor on a Dime on Facebook.

Tuesday, 17 July 2012

DIY: The No Sew Tote Bag, Made From a Pillow Case!

Bored of the ever familiar tote bag that you can get from every store? Need something to carry a few items home from the market on the weekend but want something different than every body else? Well, I did... so I decided to make this "no sew" tote bag. And it's made from no other than a pillow case!

There are sooo many great things you can do with a pillow case... this is just one of them! When I get my sewing machine back I think I want to make a dress.

These bags are so fabulous because it involves no sewing machine (which at the moment, I am unfortunately without one) to make them! All of the stitches are already there! So go grab a pillowcase and get ready to go! If you don't want to leave it the way it is... maybe it's to blah for you....grab your paint and sponge and add a design to your bag! I'm going to skip that step, but if you are feeling creative... have fun with it!!


Here's what you need:
Pillowcase (I used a standard size bag. Use king size case for a bigger bag)
Strip of Long Fabric (Strap)
Scissors or an X-acto knife
Acrylic Paint and Sponge (For pattern)

And what you do:
Lay the pillowcase down on a flat surface with the open end facing towards you.


Then grab the open end side of the pillowcase and fold it about half way up. If you are using a standard size pillowcase, you are going to want to fold it a little over half (see picture below).


If you are going to add a design to your tote bag, now is the time to do it. If you are going to use a sponge, cut out your shape you want to use from a dish sponge, dab it in paint and place the desired design on your bag. If you are doing straight lines, use painters or masking tape if you aren't comfortable free hand painting your lines. Wait for the paint to completely dry before moving on to the next step.

Next is the strap. Cut small holes on both sides of the pillowcase where the open end meets the back layer, making sure you cut through all the layers.


Stuff the ends of the fabric in the holes and knot it on both sides. I used 3 pieces of fabric and braided them together. Then I took the ends, stuck them through the holes and knotted them together.


Almost done, super easy huh?

Turn your bag over. Take the two bottom corners and fold them diagonally, bringing them together so the ends touch. Cut a small hole in each of the corners and place a small piece of fabric through and secure with a knot. Make sure you only cut holes in the corner pieces and not the other part of your bag!


If you want a tassel or button or clip on your bag, scrunch up the front and tie fabric in a knot with pieces hanging out or sew a big button on!


Now, it`s time to head to the mall and fill this bad boy up!


Make sure the straps are tied in very tight knots. You wouldn`t want your bag falling apart and everything fall out of it when you are down town!!


I'm actually impressed.. It holds a heavy enough load! Woohoo!!!

xOx - L

Click here to Like Designs & Decor on a Dime on Facebook.

Monday, 16 July 2012

DIY: Easy iPhone Cases


Now a days tonnes of us having iPhones. And as you all know iPhone cases can get pretty darn expensive! All of the cool designs are expensive and I cannot justify spending that much money on a case for my phone. I still want a kick ass cover though, so, you gotta improvise!

What you need:
Clear hard iPhone case
Scrapbook or decorative paper
Scissors
Pen

Note: The clear iPhone cases are definitely a lot cheaper than ones with designs on them. You can sometimes find clear hard cover cases at the Dollarama. If you have an ebay account, you can get them for under $2. And remember: you only need one clear one... since you can change it up as many times as you want!!!! 


What you do:
Turn whatever paper you decide to use upside down and trace around your iphone with your pen and cut your tracing out. Make sure you round the edges.

Place the cut out in the hard iPhone case to make sure that it fits and trim any excess paper if necessary.

Put your cut out and your iPhone in the hard case and trace around the camera hole (tracing it on the right side of the paper). Take everything back out and cut out the camera hole with a pair of scissors or an x-acto knife. Put everything back in your case and it's ready to use!! 


And the best part about it is: When you get bored, switch up the paper!!! No gluing makes it changeable! You can have one for every day of the week, every outfit... whatever your mood! It's great! And a heck of a lot cheaper than going and buying all those cases!

xOx - L

Click here to Like Designs & Decor on a Dime on Facebook.
DIY: Hot Tank - The 3 Braid Back


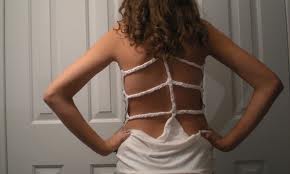
If you don't have any old shirts to use... Go raid the hubby's closet for this one ladies! Cuz this one is a hot one!! This 3 Braided Back Racer Tee is perfect for a bathing suit cover up for when you are at the beach! It also makes a nice shirt, although you have to get it the right size. My man is too big, so his clothes always end up being cover ups... for this t-shirt to be nice and form fitting you would want to go a size bigger than what you are.

You don't need a sewing machine for this sexy shirt either! You will be out and wearing it and looking good in no time at all!

What you need:
V- Neck T-Shirt
Scissors
Needle & Thread (that match shirt)
Marking Tool (chalk, pencil, marker, etc)

What you do:
Cut off both sleeves of the shirt. Draw the line you want to cut on the shirt if you don't feel comfortable free hand cutting. You are going to want to end (or start) whichever way you cut, right beside the collar line. See picture below.


Turn your shirt over so the front is facing down and you are working on the back of the shirt. Cut the collar so it's only attached at the front and the back is free. I accidentally cut mine off (as you can see from the picture below), but I can just stitch it on, no biggie, I'm just a clutz and sometimes don't think when I am doing things. LOL.


Cut two strips down the back, this will create three equal  strips down the back of your shirt. (I folded the front of the shirt down so it was easier for you guys to see what I mean). If you want more of your back to show, cut out bigger chunks of fabric (that's what I did).


Right on, now we are ready to braid. I work in sections for this part cutting one strip in to three at a time... this way you don't have 9 strips of fabric and it's less confusing working with just the 3.

Take your first strip and cut it in to 3 strips. Tug on the strips causing them to stretch and curl up and start to braid. Repeat for other 2 strips.

Once you have your three braids, stitch them to the underside of the collar. Trim off the excess material and you are ready to rock this top!


Don't mind the mess! LOL. A little big, but like I said before, if it's too big for you as a shirt, wear it as a beach cover up!!! I like it big, it looks cute with a pair of stretchies! Next time, I'd do this with a medium not an XL, hehe.

xOx - L

Click here to Like Designs & Decor on a Dime on Facebook.

Saturday, 14 July 2012

Bobby Pins: Jewellery & Storage Tips!


Bobby Pins. I know they are a girls best friend. Or one of them anyway. They go right along side the hair elastic or clip. A girl always needs to have one. It never fails you or one of the girls needs something to hold our hair back!

I don't know about you but I always try to keep them on that paper thing they come on for the longest time, cuz then they just get thrown somewhere and lost... pretty darn quickly. Until Now! Here are a few perfect ways to store your pins!

Put your bobby pins in an old Tic Tac container. Keep it in your purse for easy on the go access!


You can put up a magnetic strip (from Dollarama or Craft Store) on the side or the back of your dressing room table! The bobby pins will stick to it!


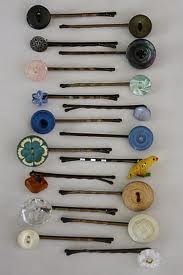
If you are bored of the regular boring colours of the pins and want something different, give them a layer of paint with your fav colours! Put buttons on them or flowers!


Or you can make your pins into a necklace! You can keep them the original colours or paint them the colours of your choice! Put them on a wire necklace after drying and you got yourself a nice cheap but sexy necklace!


Yup, I think I am going to make myself a necklace. I just don't know if I want to leave it original or paint it different colours... I like both. But I think I like colour a little bit more. And hey, when I get bored of the necklace, I've got different coloured bobby pins for my hair! Add a button or a flower and they will be cute as ever!

xOx - L

Click here to Like Designs & Decor on a Dime on Facebook.

Friday, 13 July 2012

Shirt Reconstruction... Inspiration for your Imagination!

That old shirt your going to throw out... think again! At least I do. Now every time I go to throw something out or give it away I think, will I need this for material or would I wear it if it looked different... Probably, give it a go. I mean if the shirt doesn't turn out, it's okay, it was going in the garbagio anyway!

There are so many different things you can do with your shirts to make them look different and kick ass! So let's take a look at some of my favs! For some, you don't even need to sew! LOVE IT... cuz I'm really not the best with the sewing machine... yet anyway. One day, I will master the technique, I just haven't had the time to actually sit down and get to know the thing yet!


Love this shirt above!! This shirt here involves no sewing.. just shears/scissors, some weaving and some tugging! And a hell of a lot of patience! Definitely would be nice for a day like today. It's so hot you just wanna sit here in your underwear... thank gosh for A/C, I don't know where I'd be without it this week!! I'm definitely going to try to do this shirt sometime this week! We will see if I succeed in making it similar to this one!


This DIY Workout Shirt is super easy... and you will look super cute working out!! If you don't have an old over sized shirt, go steal an old one from your man, your brothers or your kids. All you need is a shirt and a pair of scissors for this hot tank!

For the full DIY tutorial for this shirt, click here. 


This again, is no sew, just cutting and weaving!!! This is definitely for an experienced cutter and weaver. I'm not quite there yet. Maybe when the shirts are out of style I'll be a pro! LOL.  It's hard to explain weaving in a tutorial, but there are lots of tutorials on youtube for weaving shirts... cutting too, that's where I learned. You tube is AWESOME!! lol.

Anything you wanna do, you can find how to do it there!!


I'm currently making this braided back shirt! I started it before I went away on holidays, didn't finish it yet, but I plan on doing that soon. And with the finished product comes a step by step! So, if you like it, stay tuned within the next coming week for the know how! And if you want to wear it like... this weekend, search the internet, I'm sure you will find something!!!


Well, these bracelets aren't shirts... but they are made out of out shirts!! Awesome!! You can use as many colours as you like... or as many t-shirts! Maybe your shirt is already multi-coloured... that might be cool too!


This shirt would be nice for those cool summer evenings. I think it's super cute! Who's up for this challenge??

Anyways, I hope some of you, like me, make new clothes out of old clothes!! I love when someone asks where'd ya get that shirt? And you get the pleasure of saying I made it! :) Nothing makes my day more!

xOx - L

Click here to Like Designs & Decor on a Dime on Facebook.