Showing posts with label Painting Projects. Show all posts

Monday, 23 July 2012

DIY: Customized Makeup Brushes!!!


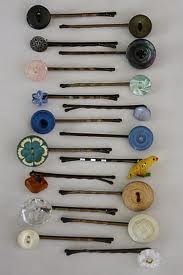
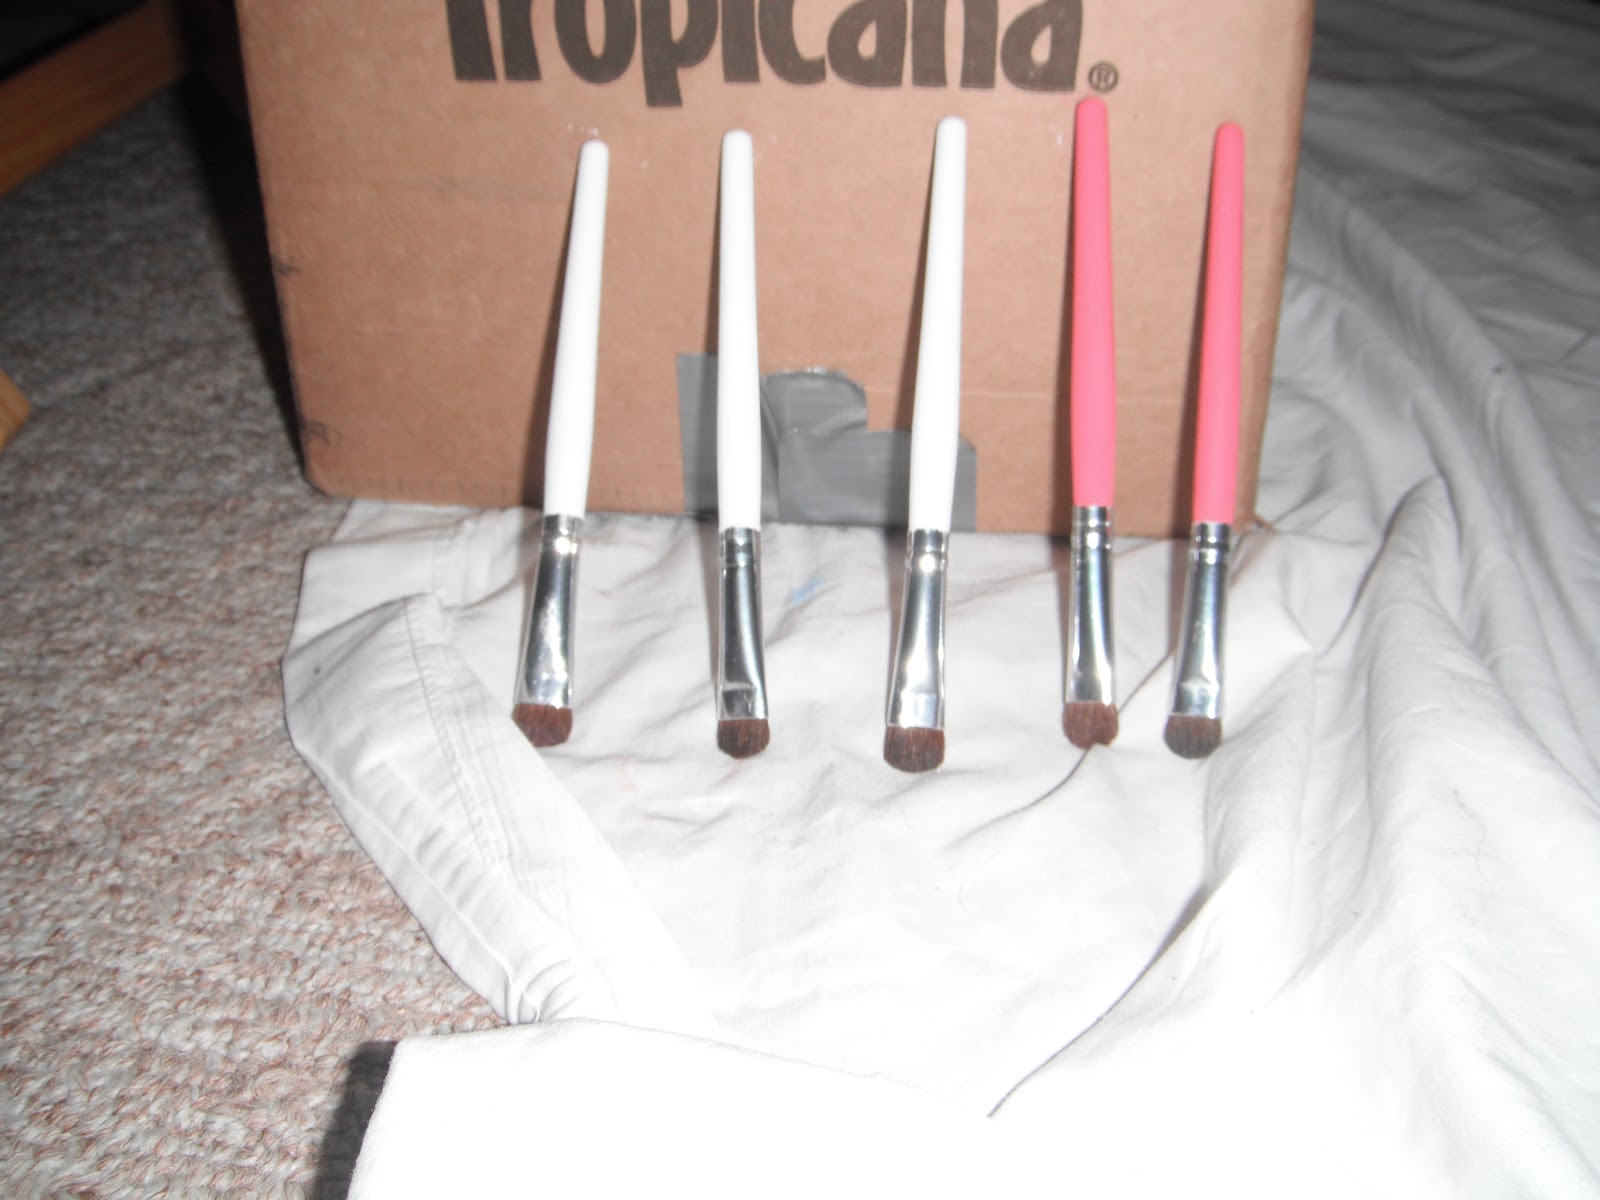
Feeling crafty and you just need to paint something? I get that urge... a lot! So I looked around the house in search of what I could find. I have a lot of makeup brushes... mostly for my eyes, a few bigger ones for blush. But I'm definitely an eye shadow kind of girl, always wearing different bright colours, resulting in having a few brushes, most of them being plain white. As you can see from the pics below, they aren't new... I just grabbed the brushes that I have now, they are good brushes that last awhile. And it's definitely time to dress these bad girls up!

I see a lot of awesome printed make up brushes in the store, but of course, they are rather expensive and something I won't spend a lot of money on. So lets just see what these hands can do!

I'm sure all your friends will ask where you bought 'em. :) They'll be asking you to make them some too after you tell them your little secret... You made them yourself! FYI: If you want to do this and you don't have brushes or if you are doing this for a gift for your bestie, the Dollarama has brushes and they work great!!

What you need:
Wooden Makeup Brushes
Sanding Block
Craft/Acrylic Paint
Paint Brushes

What you do:
Sand down the handles of the brush to roughen them up so the paint sticks to the surface better!


Paint on your base coat and let dry.


If your brushes need another coat, add a second!


Once your base coat(s) completely dry it's time to get creative and paint pretty designs on them! Or you can just leave them the one colour! Have fun with it! Be colourful or go for the black and white look!! I'm not the best free hander ... but I did it anyway! I was gonna get out the tape... but thought it a little too much if it's just for me!!


Definitely makes me like doing my makeup all the more better in the morning with my pretty new brushes! 

xOx - L

Click here to Like Designs & Decor on a Dime on Facebook.

Sunday, 22 July 2012

DIY: Vintage Key Frame


Don't know where to hang your keys? Or don't like what you have now? Make a vintage frame into a key holder! This would even make a wonderful house warming gift for your friends... or kids!

If you don't have old frames around your house, ask your parents. I am ALWAYS on the look out for stuff like this at all times... just in case for quick projects like this. Thank god for storage! Although it's getting awfully full! LOL

What you need:
Frame
Screw Hooks
Screw Driver
Paint - If need be, colour of choice

What you do:
Paint your frame the colour of your choice. Rub some off for the vintage look. It would also be cool if you did the faux metallic (with the tin foil)... or just buy the metallic paint, it's just expensive I find!

Drill holes into the frame (size to match your screws). After holes are drilled, screw in each hook. And your done!

Easy as pie and looks great! Mount it to your wall and put your keys in there! Or wrap it up as a gift!

xOx - L

Click here to Like Designs & Decor on a Dime on Facebook.

Thursday, 19 July 2012

Turning Drawers in to Shelves!


So my boyfriend comes home with two drawers in the back of his truck last week. When I seen that he didn't have any thing else... like a stand or a dresser, I realized... I think he has a project in mind.

Yup, I hit that nail on the head! I asked him what they were for. He said you hunny! hahaha! Too funny, I don't effin' want them! Just another thing to add to "Lindsay's F'n List of Things To Do". He wanted me to make him "drawer shelves" because I mentioned them once before. He had them stuck in his head. So since I love him Oh So Much, I decided I would make them for him... you know, for his "Man Cave".  So they sat there, taking up space, until I just couldn't look at them anymore. They have to be done, they have to get out my space and in to his. You know you love someone when you do their shelves before your t.v. stand...and ALLLLLL your other projects... LOL

These are just ordinary drawers, they look like they were from a desk. I believe Kev found them on the side of the road on good garbage day to tell you the truth... Hey now, nothing wrong with that... have you ever seen what rich people put on their curbs? Man, I'm telling ya, sometimes you can find real gems!


So I got out my trusty tool set and went to work removing the handle and the side sliders from both of the drawers.


If there are any holes, fill them with wood. If you are going to be connecting your drawers to attach the shelves later, you can leave two of the holes in the front (where the drawer handles used to be) to attach them after you are done painting. I didn't know what we were doing with it yet... so I just decided to fill all the holes and deal with it later.


Yup, I'm messy, I know!! lol

Once the wood filler is dry, it's time to sand. Sand the drawers where you are going to paint to roughen them up so the paint sticks better... and sand the wood filler where the holes were making it nice and smooth and even, you don't want to see them when you paint!


I decided not to paint the whole drawer, so I taped off some edges before painting. Tape any edges off before painting if need be. Make sure the tape is tightly pressed down on the edges, you don't want the paint to leak. If you did a base coat first and want to do some fine edge work, tape the edges and paint over the edge of the tape with the colour of the base coat. Let it dry and then paint your second coat. The base coat seals the tape and gives it a lot less chance of seepage.


And it was time to paint. Woo hoo! I decided on black because it will match all the other shelves in his room. After the first coat was done and dry, I gave it a second coat. Looking at it, I knew I definitely didn't need a third coat, so before the paint was dry, I peeled off all of the painters tape. The paint peels and sucks real bad if you leave the tape and remove it when the paint is dry... trust me... I know from previous experiences, LOL.


I was going to put a stencil in the background of Kev's fav show SOA (Sons of Anarchy), but he saw the shelves and he decided he wanted them now... and he said quote unquote "people aren't going to see them anyway, what's it matter what it's got on em".... MEN (well most of them)! They just don't understand!!!!!


So... I did a final coat of protector/sealant on the shelves, a little saddened that I didn't get to do the stenciling might I add, but only for a short minute, on to the next project that's been waiting for awhile... my t.v. stand.


Before Kevin could take them for his "Man Cave" I decided to decorate them just a little bit... you know, so they didn't look so bland for my pictures! Yay Me! I'm learning! LOL

xOx - L

Click here to Like Designs & Decor on a Dime on Facebook.

Monday, 16 July 2012

DIY Wall Art | Made out of Recycled Toilet Paper Rolls!


Who knew something so beautiful could be made from toilet paper rolls! I've always wanted to make something out of TP rolls, but I just have never gotten around to it yet. Until now, I decided. I really need something for the empty wall in my dining room and I thought a design out of the rolls would look awesome!

The only thing I haven't decided yet is if I want to make it look like rustic metal or paint a colour or two... I honestly think colours are one of my biggest challenges. I never know what colours to pick.


You don't need much for this project at all. TP rolls, scissors, paint and glue.

Deciding how many toilet paper rolls you need all depends on how big you want your art to be. The bigger the art, the more rolls you area going to need. One roll will get you 5 "petals". That's what we are going to call them, because to me, that's what they look like, lol. You can also use paper towel rolls, which are bigger so will get you more petals. Once you have enough toilet paper rolls for your project, you can start cutting them. Squish the toilet paper roll down so it is flat (see picture below). Like I said before you can get 5 petals from one TP roll. Cut out as many petals as you need.


Take your petals and start making a design. Move them around until you find a design that works for you!


Once you have a design in mind, take a picture so you remember what it looks like and decide whether or not you are painting them. If you are, now is the time to do it! I decided to paint mine black and pink. Half way through I decided I wanted a bit of gold in there too, so I painted the outside and then the inside and let them dry.


Get out your camera and resort to the picture you took previously of your design and start to lay out your petals to match the picture! As you can see, mine looks nothing like the first picture, haha, but I knew that was going to happen, it usually does! If you are using a hot glue gun, start to heat it up, it's almost gluing time!


Note: If you don't want to use glue, you can use staples. I prefer glue.

Glue your petals together one by one. If you are making a design, you might not be gluing all your flowers together. If that is the case, start to glue your design, petal by petal and link it all as one. If you are doing all flowers like I am, you can create all your flowers first, petal by petal, and then glue them together.

Once your design is in place and secured with glue, let it dry before hanging it up. If you stapled it, you can skip the drying part! Duh!


I put 3 little finishing nails in the wall and hung my flower wall art up above the doorway in the hallway! I think it looks awesome! I'm glad I didn't do it any bigger like I was going too... then it would have been just a little too big!

xOx - L

Click here to Like Designs & Decor on a Dime on Facebook.

Saturday, 14 July 2012

DIY: Faux Lacquer Boxes


I am in love with wooden lacquer boxes. Problem is... they are expensive as shit and quite frankly I don't have $75 to $200 to spend on boxes! Insane!!!! I mean, I wish I had that kind of money to spend on boxes... but I don't, I have to buy clothes and food and pay bills, lol.

I know my boxes will never quite be the exact same as the beautiful lacquer boxes you see on the shelves in stores, but I'm hoping to get darn close. I like to sit in front of the t.v at night at paint, so I love having lots of little projects on the go!


If you like what you see and wanna give these a go... check it out!!

Mats:
Wooden Boxes (from any craft store, Dollarama)
Sandpaper
Small Screw Driver
Wood Filler
Paint (colours of choice)
Gloss or Glaze
Painters Tape
Paint Brushes


Deets:
First things first, remove the clasps at the front of the box with your screw driver. Only remove the front, keep the hinges on the back in place. Fill the holes with wood filler. If you don't have any around, you can just use paint (use your base colour). Once the holes that are plugged are dry, sand the box so it gets nice and smooth!!

Once the box is sanded to your liking, it's time to paint the base coat. Give your box 2 coats of paint (more if needed).


Don't forget to put tape in the opening... you don't want your box to get sealed shut! Once it's fully dry, give it a light sanding to get rid of any brush strokes, paint etc. 

Tape your box with painters tape to form your stripes. (Gurr kinda pissed, when I went to do this it was late (you know... my t.v craft and all) in my PJ's, ready for the tape and I have none!!! Someone forgot to tell me we were out... cough cough. Anyways, thank god for masking tape, but still not the same perfection). Okay, sorry, got off track there.


Once your tape is on forming the lines, take your base colour and seal the edges of the tape.


Once dry, paint over it with your stripe colour and fill in the lines! Do as many coats as you need. Once you are done your last coat, peel up the tape (while paint is wet), I find it works best this way!!


You will notice you have to do multiple sittings for the lines. At least I did. Unless you are the master taper, it's just easier that way. Try doing your vertical lines first and then your horizontal, allowing to dry in between.


Once all of your lines are on, it's ready for the gloss/glaze. Give it two coats, allowing to completely dry in between, don't apply your second coat, even if the tad bit sticky. If you don't want the shiny look, you can just leave them matte and not put any final coat on!

Once dry, they are ready to be shown off! Whether it/they sit on your desk at work or are for decoration at home. Mine's on my desk, cards and sticky notes inside.


I know they aren't perfect like the real deal. They aren't as smooth or as lacquer-ish (yes, I make up words)  but they aren't as expensive as them either! I love them and think they are perfect and adorable! I'm more in to "look alike copy's" anyways!!

xOx - L

Click here to Like Designs & Decor on a Dime on Facebook.

Bobby Pins: Jewellery & Storage Tips!


Bobby Pins. I know they are a girls best friend. Or one of them anyway. They go right along side the hair elastic or clip. A girl always needs to have one. It never fails you or one of the girls needs something to hold our hair back!

I don't know about you but I always try to keep them on that paper thing they come on for the longest time, cuz then they just get thrown somewhere and lost... pretty darn quickly. Until Now! Here are a few perfect ways to store your pins!

Put your bobby pins in an old Tic Tac container. Keep it in your purse for easy on the go access!


You can put up a magnetic strip (from Dollarama or Craft Store) on the side or the back of your dressing room table! The bobby pins will stick to it!


If you are bored of the regular boring colours of the pins and want something different, give them a layer of paint with your fav colours! Put buttons on them or flowers!


Or you can make your pins into a necklace! You can keep them the original colours or paint them the colours of your choice! Put them on a wire necklace after drying and you got yourself a nice cheap but sexy necklace!


Yup, I think I am going to make myself a necklace. I just don't know if I want to leave it original or paint it different colours... I like both. But I think I like colour a little bit more. And hey, when I get bored of the necklace, I've got different coloured bobby pins for my hair! Add a button or a flower and they will be cute as ever!

xOx - L

Click here to Like Designs & Decor on a Dime on Facebook.

Wednesday, 11 July 2012

Canvas Love - Wall Art


Another boring day at my casa ... it always leads to something. I found a couple small canvases that I had bought awhile back for another DIY project that I never got around to doing... and in all honesty, I can't remember what they were for.

Since they are small, I decided to do a couple abstract paintings for the hallway by the door. They will look perfect!! I wish I had three, but two will do just fine.

So I grabbed my acrylic white paint and gave the two canvases 2 coats to brighten them up and waited until they were dry. I was just going to leave them, since you know... they are white already, but the white paint does look much better... and mine kind of got a little dirty from being in my drawer for who knows how long.


Once the white paint was dry, I grabbed my painters tape. It's pretty thick and my canvases are pretty little, so I decided to trim the tape in half lengthwise and some in half again to make the lines smaller. I just started cutting tape and sticking it in random places.


When I finally had all the tape on in a design that I was happy with, I grabbed two of my most favourite colours! Yellow and Deep Purple and started to paint. Eeek exciting!! (Yes I get excited over the littlest things) I put on one coat, let it dry and put on one more!


Once the paintings were dry I CAREFULLY peeled off the tape. In all honesty... something ALWAYS happens to my lines, no matter how friggin' careful I tend to be... soooo I'm usually pretty careless now when it comes to them... as you can see just painting completely over the tape like a mad woman!

Moment of truth... they turned out alright, a few little smudges, but nothing too horrible that I can't live with. Showed the hubby from a distance, said he couldn't notice. So they are okay in my books!


I think I am slowly running out of places to hang things, lol. Another reason my friends love me... They get gifts!!! :)

xOx - L

Click here to Like Designs & Decor on a Dime on Facebook.

Monday, 9 July 2012

Old Tray Makeover - For A Friend.


I had this old Coca-Cola tray that I had bought years ago at a yard sale. I never use it. It has sat on a shelf since the day I bought it, why I even got it is beyond me. It was beaten up and scratched and not worth anything so I decided instead of throwing it out, I`ll redo it!

So, I was going to do it for me all cute and nice and then I thought... where will I put it.. Back on the shelf? Probably! I literally have NO where to put it what so ever. But I still didn't want to throw it out.

So I thought about it for a little bit and thought of a friend of mine right away! He could use a tray. lol. So I went to work! I knew what he would use it for, so I got creative. I "borrowed" a magazine (hehe borrowed as in took it... without him knowing) and starting going through it totally demolishing his mag. Cutting out words to decoupage to the tray. After cutting out what I thought was enough words and phrases I got out the paint.

I sanded the tray lightly making it as smooth as I could. Ready for the paint. At first I thought blue is nice. So I painted the whole inside of the tray blue.


The bottom of the tray was soooo horrible and rusty that it definitely needed a dark colour, so I chose Black


Once that was done and dry I decided I really didn't like that the tray was all blue inside. Even though most of it was getting covered up, I just didn't like it. So I taped around the edges and gave the bottom a couple coats of white!


I took off the tape once it was dry and out game the Mod Podge. I grabbed the magazine clippings that I cut out and placed them on the tray making sure they would all fit alright. After I was satisfied I mixed the Mod Podge with a little bit of water and was ready to go. One by one I glued the back of the clipping and glued it to the tray. After they were all glued down I went over the whole tray with a thin layer of Mod Podge and let it dry. Once dry I painted a thin layer of glaze over the whole tray (top and bottom). Let it dry. I don't know if I'm going to do multiple coats and sand it yet... will figure that out tomorrow after I let it sit abit.


I hope this doesn't offend anyone, and if it does I am sorry, I really had no intention to. Like I said, this is NOT FOR ME. It is for a friend, who is legally allowed to smoke for medicinal purposes only. I thought he could put all his "stuff" on it.

xOx

Click here to Like Designs & Decor on a Dime on Facebook.

Tuesday, 3 July 2012

Metallic Table - DIY!!


I'm sure by now you have all seen metallic rusted tables and accessories out in the stores lately. And I think they are HOT HOT HOT!! But they are also pretty pricy! The metallic paint still tends to look like it has been painted on doesn't always look the best. Well, try this technique from vintage revivals to get the look... without going to buy the metallic paint...

Can you guess what you use? Well I'm sure by now you have all guessed Mod Podge, steel paint (see pic below).. and Tin Foil to complete this look! If you have some glaze in a black tint, grab it too, although I think this can be done without it.

So grab your old night stand or table, tinfoil, Modpodge and some popsicle sticks or thick card of some sort to guide the tinfoil down and we are ready to do this!

Lightly wrinkle a piece of tin foil (as big as piece as you feel comfortable working with) then apply a coat of Mod Podge to your table and put the shiny side of the foil down where the Mod Podge is. Smooth it down carefully so it doesn't rip, we all know how easy it is to rip tinfoil. Smooth it down with a popcicle stick or a card and then apply a coat of Mod Podge on top of the foil. Make sure the ends of the foil are all flat. Repeat until your table is covered! You will most likely end up layering the tinfoil, but it kind of completes the look and if you really want you can continue layering it with sealant and sanding to get the exact look that you want. You can also apply another layer of Mod Podge after you are complete to make sure it really has some coating on it!

Get out your Steel Paint (see picture below) Paint it on and rub it off really quickly, working in small sections. You will see the piece changing colour!


I don`t have black glaze, so I`m hoping I can skip this step and save money (will let you know, you too if you try this)... but if need be, use a Glaze in tinted black, like Ralph Lauren`s Faux Glaze in Black Silk. Put it on and rub it off.  Just like the steel paint. Let dry!!


Ta Da complete!!! I love love love this. Like I said before. I think I`m going to do our night tables like this when I re-do our bedroom.... unless I think of something else by then... hehehe


xOx

Click here to Like Designs & Decor on a Dime on Facebook.

Saturday, 30 June 2012

DIY: Marbleized Paper/Canvas


This is a great activity for you and the kids... or just for you... Heck, I don't have kids and I LOVE doing it!! I always make my own cards and invitations so I like to do a bunch at a time so I have some when I have to create a random card. It really gives it a great look! Or they are great for table place cards or gift tags. I've always wanted to do these on bigger sheets or do a whole pile of them and decoupage my desk!! Looks awesome as a back splash on a canvas too. Or paint the canvas black and put colours and white. Ooohhh  Hello Wall Art!! Quick next project - Check!!

Anyways, it's really quite quick and simple, not too mention fun... it can get a wee bit messy, but what kind of fun is it with no mess? Anyways, no matter what you decide to Marbleize, use the method below.

Here's what you'll need:
Shaving cream - Must be foam, not gel
Paint (acrylic, tempera) or Food colouring - Whatever colours you choose, variation up to you!!
Paper/Canvas for marbleizing - Cardstock works best
Shallow tray on pan - That will fit your paper
Toothpicks 
Cardboard or card - To spread & remove shaving cream 


Here's what you'll do:

Fill your shallow pan or tray with a layer of shaving cream approximately 1/2 thick so it covers the whole bottom of the tray. Using a piece of cardboard or a card spread the shaving cream into an even layer.


Drip your colours of choice onto the shaving cream in various locations.


Once you have the desired amount of paint use the toothpicks to drag the color through the shaving cream. Drag back and forth in one direction then back and forth crosswise. Go in swirls and circles if you like. You may need to add more color as you go until you have the proper amount.


Gently press your paper into the shaving cream, making sure it is fully covered and then carefully lift it out and place it aside.


Repeat the above steps with the rest of the paper. You will most likely have to drip more colour into the shaving cream and spread around with toothpick as the paper will lift the color out of the shaving cream. You can continue using the same shaving cream for awhile. 

Leave your sheets of paper aside with the shaving cream on them for a couple minutes allowing the colour to really set in the paper.  


Grab a piece of cardboard and gently guide the shaving cream off of the paper, wiping them clean with paper towel afterwards if you still have some cream left.


There you have it! Marbleized paper/canvas! Pretty easy huh? Decorate the marbleized paper as you wish and you are good to go!

 
 xOx

Click here to Like Designs & Decor on a Dime on Facebook.