Showing posts with label Remixed Recipes. Show all posts

Sunday, 22 July 2012

Make your Kids Their Own Craft Supplies!! 6 DIY Recipes!


If you have a kid or two running around your place... then this post is for you! I was sitting here thinking of what to do with my niece when I watch her... and I was stumped, so I called a friend who gave me ALL sorts of great ideas. FYI: I have no kids. So if you have your kiddo's home for the summer throughout the week, or even just have to entertain them on the weekends because they are in Daycare... whatever... it's summer!

Have some fun with some of these home made recipes... Some might be messy...er than others!! But all in all, the kids will have fun! And I'm sure you will too! Keeping in mind... the kids (depending on their age) are only going to be using the stuff... you Mom or Dad or sister... or babysitter, or in my case Aunt... are going to be the one making it!

The great thing about these supplies is they are non-toxic, all natural which is excellent since its kids that will mostly be using them!

Sidewalk Paint

Supplies
Food Coloring - Liquid
Hot water
Cornstarch
Small bowls (one for each colour)
Bottles or Containers (one for each colour)


Directions
Pour a 1/4 cup of corn starch into each bowl and then add a 1/4 cup of water into each bowl. Add 6-9 drop of food coloring, and stir until it is completely blended. Pour each colour into it's own bottle or container to store it. If the paint has sat awhile and started to separate, shake it up really good before using, it will be fine.

Watercolour Paint

Materials 
Baking soda
Cornstarch
White vinegar
Light corn syrup
Food coloring

Note: If you don't have cornstarch you can boil 1 cup of sugar and 1/2 cup of water until clear and use that!


What you do
Combine 3 tablespoons of baking soda, cornstarch and vinegar (3 tbsp each) and add 1 1/2 teaspoons of Cornstarch. Once the fizzing subsides from the mixture, stir it until it's well mixed. Pour the mixture into container (you can get a paint tray at the arts and crafts or dollar store or you can use a plastic egg carton or whatever you can come up with) and add the food colouring. Make sure you add the food coloring right away, as the paint starts to solidify almost immediately. Once mixed, leave them out to harden for at least three hours before use.

Finger Paint

Supplies needed
1 cup of cornstarch
3 tablespoons of sugar
1/2 teaspoon of salt
2 cups of cold water
Food coloring or Natural dyes


What you do
Combine all ingredients except food coloring in a medium saucepan and mix well. Cook over low heat, stirring constantly, until thickened, for approximately 10 minutes. Remove from heat and allow to cool. Divide into separate containers and add food coloring. Keep in mind that this homemade recipe for finger paints works best when it's used right away. So use it up the first time!!!

Glitter

Mats
1/4 cup of salt
1/2 teaspoon of food coloring - Must be liquid
Baking Sheet
Tin Foil


Deets
Preheat oven to 350 degrees. Mix salt and food coloring in a small bowl until the salt is fully coloured. Spread the mixture out in an even layer on a foil-lined baking sheet. Bake in the oven for 10 minutes. Allow to dry before using! If mixing different colours, mix in separate bowls. You can separate it on the baking sheet or bake at separate times. Store in air tight container. Your homemade glitter will last for months!

Paper Mache or Craft Paste 

Materials 
1/4 cup of salt
1 cup of flour
1 quart of water
Saucepan
Jar or Container to put the mixture in


What to do 
Boil one quart of water in a saucepan. Remove from heat and stir in the salt. Gradually add the flour, stirring constantly to prevent it from lumping. Stir until the mixture is the consistency of thick gravy. You may need to add a little more flour or water to achieve the desired result. Allow the mixture to cool before using it. You can use the paste immediately or store it in the refrigerator for up to five days.

Paper Glue 

What you need 
1/2 cup of cornstarch (cooked and stirred)
1 1/2 cups of water
4 tablespoons of Light corn syrup (or 1 sugar 1/2 cup water, boiled until clear)
2 teaspoons of White vinegar
Saucepan


What you do
Combine 4 tablespoons of light corn syrup, 2 teaspoons of white vinegar and 1 cup of water in a saucepan and mix over medium heat until thickened. Once thick, remove the mixture from the heat. In another dish mix together 1/2 cup cornstarch with 1/2 cup water and add it to the other heated ingredients. Stir well until blended. Put it in a container and it's ready to use! Use this glue immediately after making or you can keep it in the fridge for up to about 2 months or so. It's good for any craft that require transparent glue... like cards or scrapbooking.

So, surprise your kids with some paint and have some fun today... or whenever you can! Or make some glitter or paper mache for yourself!! Enjoy!!

xOx - L

Click here to Like Designs & Decor on a Dime on Facebook.

Wednesday, 18 July 2012

DIY: Homemade Powdered Laundry Detergent... While I'm at it...


I thought while I was at it with the fabric softener... I might as well post a remixed recipe for powdered laundry soap... you know, to go with the fabric softener!

In the end, it's much cheaper to make your own laundry soap (and fabric softener, click here for recipe)... along with a lot of other things! Everyone has their own versions... and here's ones mine.

Supplies
1 bar Laundry Soap ((I like all natural ->Dr. Bronner’s All in One Hemp Bars, lavender) or Fels Naptha)
2 cups Arm & Hammer washing soda
2 cups Borax
1 Cheese Grater
1 Blender
1 Bowl

Optional
1 cup Oxygen bleach (I use Oxy Clean)

Note: You don't have to use the oxygen bleach if you don't want too. Add it to give it a sort of brightener. I would stay away from using it all together if you have a lot of clothing made out of silk or wool as it can discolour them. If you do add the oxygen bleach, take your silk and wool to the dry cleaners or hand was them! It is safe for your coloured clothes and can still be used when you bleach your whites.

Note: If you can't find any bar laundry soap in the laundry detergent aisle in your local store, check  next to the regular body bar soap... it might just happen to be there! LOL.

Directions:
Grate the bar soap on a fine cheese grater over a medium bowl. The soap will dry out if you unwrap it and leave it out for a couple days previous and it will grate a little easier, not much (so you don't have to do this) but a little.

Next add the Borax, the Arm & Hammer washing soda and if you are using the oxygen bleach, throw that in the bowl too and stir until it's well blended. Put your mixture in a blender and mix 1 cup at a time on high until you have a fine powder. Pour the powder in an air tight container. Repeat blending the rest one cup at a time until all of the detergent is done! Store in your air tight container until you are ready to use it!

If you want to make a big batch, giver! Double the recipe and you are good to go! 

And guess what? You barely even need to use any! Awesome!!! 

Use 1 tablespoon per load. If laundry is really dirty, use 2 tablespoons.

Enjoy!

xOx - L


Click here to Like Designs & Decor on a Dime on Facebook.

DIY: Homemade Fabric Softener ... It's ALL About Saving $!


Seriously, I don't care who says making homemade remedies is stupid or a waste of time (honestly, some of my friends laugh at me...) they are WRONG ... and I just laugh at them cuz really, I'm the one that's saving in the long run!

This recipe doesn't take too much to make, you will be doing your laundry with this wicked softener in no time! Seriously, no time. I think from start to end it took me a total of 8 minutes... and I was taking my sweet @ss time!

What you need:
2 cups of Hair Conditioner (Scent of your choice)
3 cups of Distilled White Vinegar
6 cups Boiling water

Note: Remember when choosing which conditioner you are going to use -> that is what your fabric softener is going to smell like. If you like coconut, berries or lavender... get a conditioner that smell like it. Now... you can't beat that... cuz there isn't the biggest selection of different scents of detergent in the stores... at least I don't think so anyway.

Pour the 6 cups of boiling in water into a big mixing bowl. You can use cold water, many recipes you will notice call for cold water.... I use hot water, it mixes the ingredients much better, which means... Less stirring! After the water, add the conditioner, then the vinegar and stir!

I have been using this for awhile now and I LOVE it! I love how you can make it the scent you want! Mmmm. Nothing like fresh smelling laundry! Oh and don't worry, it does not come out smelling of vinegar.... as long as you don't add too much!

Enjoy!

xOx - L

Click here to Like Designs & Decor on a Dime on Facebook.

Tuesday, 17 July 2012

Get Radiant Hair w/ a DIY Banana Smoothie Face Mask


Okay, as good as a banana smoothie sounds right about now, you can't drink it... you just can't. It's not your regular smoothie ladies and gents...  it goes in your hair... your hair wants to drink it too, so let it get the goodies for once and you be the jealous one! LOL!

If your hair is dry or overworked like mine has been lately, treat your hair with this banana smoothie hair mask, let the banana's moisture your hair and leave it with a mad shine! Do this when you have an extra half hour to an hour to spare, like at night... while you are on the PC or watching t.v. One of the best things... you probably have everything you need... you won't even have to go to the store!

Here's what you will need:
1 mashed banana
1 egg
3 tablespoons milk 
4 tablespoons olive oil
3 tablespoons honey
1 bowl
1 comb
Get out a bowl and combine all the ingredients one by one, mixing it well. Once mixed to your satisfaction, using a comb, apply the mask to your hair from the roots to the ends.


Leave the mask on to soak into your hair for about fifteen to thirty minutes. The longer you wait, the better it works. So if your hair is really damaged, you will want to leave it on for a full thirty minutes.

Rinse out the mask with cold water (we learned that). Once the Banana Smoothie mixture is completely rinsed out of your hair, you can shampoo and conditioner as usual.

Style your hair as you normally do, do you notice the difference?? Do this mask when you notice your hair is getting dry again. It varies with different types of hair. Or you can do the treatment weekly for best results.

xOx - L

Click here to Like Designs & Decor on a Dime on Facebook.

Monday, 16 July 2012

DIY Bath Cookies! ... No you Cannot Eat them!


Mmmm, I love making things SO good that you could almost eat them... like these bath cookies! Well, I wouldn't eat them, but they made me want cookies SO bad that I made Kev whip up a batch of his famous cookies. I ate about a dozen. Now I'm bloated and huge and feel bad. Oh well, it's the weekend right?... You are allowed to indulge on the weekend! Just means I gotta work out super hard tomorrow!

These bath cookies make a great gift as well! Do up a cute little gift basket for your girl friend or your Mom. Keep some for yourself while you are at it. Make a double batch and give them to all the ladies at work for x-mas or whatever!! Make a label with directions and a picture! They will love it!


You all probably have the first few ingredients in your home, but might not have the oils. The good thing about them is once you get them, they last you for awhile... and there are all sorts of goodies you can make with them, so they are definitely worth it to buy!

Mats:
2 cups of Sea Salt / Rock Salt
1/2 cup Cornstarch
1/2 cup Baking Soda 
1 egg
1 tsp Vitamin E Oil
2 tbs of Almond Oil
6 drops Essential Oil (whatever you prefer, I loooove my Vanilla)

Optional: Add white or chocolate chips or oatmeal to your mix (or anything really) - Approx. 2 tbsp 

Note: Makes approximately a dozen cookies, depending on size.

Deets:
Mix all the ingredients together in a bowl. Make the dough into balls and flatten them out to resemble a cookie on a cookie sheet. Or you can roll out the dough (put flour down first) and cut out cookies with cookie cutters. Place the tray of cookies in the oven and bake at 350 F for 10 to 12 minutes. Once they are cooked, allow them to cool.

Once the cookies are dry place them in air tight packages or an air tight container. They will last for months!


Place one or two bath cookies in the tub with running warm water and lay back and enjoy!

xOx- L

Click here to Like Designs & Decor on a Dime on Facebook.

Frizzy Hair: 6 DIY Home Remedies to Help


I have curly, thick hair. And I have frizzies. Especially when it's hot and humid like it has been for the last couple weeks. I used to straighten my hair daily, but with this heat I couldn't be bothered. It started at the end of May this year! Ridiculous!!! But the frizzies come out two times as bad when my hair is curly, so I need product to help keep them under control. John Frieda works GREAT! Problem is... it's expensive... and such little bottles. Every single serum that seemed to be any good was at a salon for $20 to $30 bucks or at Walmart for $10 to $20. Argh! Go figure, that's just my luck. Especially when I'm not working! I was lucky and got a few samples in the mail, but they only lasted a little while (just like all my other serums)! So I looked into ways to make it.  And of course, I wanna share them with you!

Here are a few home remedies to try on your hair if you have the fly aways! 


A Carbonated Water Rinse 
For those of you who let your curls air dry (this is me), this is a great remedy for you to eliminate hair frizz caused by humidity. After you wash your hair (both shampoo & conditioner if need be), give it a final rinse with sparkling or carbonated water. They will both reduce frizz because of it’s low pH level.


Olive Oil or Coconut Oil
I'm sure most of us have olive oil in the house. Some, have coconut oil too. You can use whichever you prefer... either way - oil fights the frizzies like you wouldn't believe!
To whip up some oil conditioner, all you have to do is heat up one cup of oil (whichever you prefer, or have) in a glass jar. You can do this in the microwave. While warm, wet your hair and apply your mixture evenly throughout your hair. Do not wash it out! Cover your hair with a shower cap (or plastic bag if you don't have a cap) and wrap a hot towel around your head to increase moisture absorption. Keep this in your hair and your towel warm on your head for approximately 30 minutes. You need steady heat from your towel, so you will have to reheat it once or twice in the process. After you have let your hair absorb the mixture, shampoo and rinse your hair with cold water and style as normal.

Note: Add an egg to your oil, the egg contains L-cysteine, a natural amino acid that helps with building cells and repairing tissue.
  

Mayonnaise and Avocado Conditioner
Dry frizzy hair? This one's for you! Mix 1 cup of mayonnaise with 1/2 an avocado until you have a paste. Rub it throughout your hair distributing evenly and cover your head with a shower cap or plastic bag. Wrap a warm towel around your head and leave on for 20 minutes and wash out. 


Apple Cider Vinegar
I'm sure you might have all heard of this remedy before. I remember doing this when I was a little kid. Well my Mom helped me. But it's definitely been around for awhile. This prevents frizzies and will give your hair a nice shine. Two in one, friggin eh!! And it works great! Get a bowl or a water bottle and mix equal parts water and apple cider vinegar. I'd go a cup and a cup, or half and half, depending on how much hair you have! Wash your hair as per usual but give it a final rinse with your mixture! 

White Vinegar
Smooth and flatten your hair cuticles by combing white vinegar through washed hair with a comb. Then condition your hair as usual. When rinsing your hair, use water as cold as you can bear. Using cold water helps lock down the cuticle and makes hair appear slicker and smoother.


Honey - After Shampoo Rinse 

Mix 1 tablespoon of honey with 1 quart of water. Pour your mixture through your shampooed hair while it's still wet. Rinse out and condition as per usual. Honey will attract and hold water molecules and can help to moisturize your hair.

Hopefully you found a remedy to help you out! I'm sure out of one of these, you will find one that suits you. And remember even though I said conditioner after some of these procedures, you will notice you won't always have too. Enjoy!

xOx - L

Click here to Like Designs & Decor on a Dime on Facebook.

Monday, 2 July 2012

DIY: Vick's Vapour Shower Disks


Vick’s VapoRub shower disks clear out your sinuses while you’re showering, making colds feel better. You might have seen them advertised on TV. Well Sarah of Frugal by Choice, Cheap by Necessity made them herself, sharing her know how and I wanted to share with you guys!

What you'll need:
Baking soda
Water
Essential oils: eucalyptus, rosemary, and lavender.
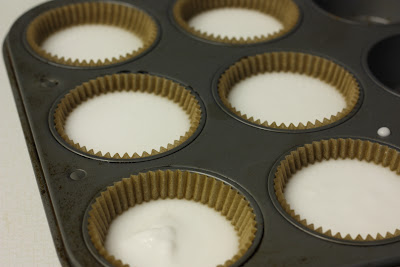
Muffin tin
Muffin liners

You can get the oils at your local health food store or GNC. It would definitely be worth going to pick up the oils, they can be used for so many different things!! 

For the know how of this awesome DIY click here to visit Sarah's page!

There are also tons of other goodies if you wanted to browse her page!!  
 
Click here to Like Designs & Decor on a Dime on Facebook.