Showing posts with label Sewing Sensations. Show all posts

Wednesday, 18 July 2012

DIY: Make a Mini Notebook

Another fetish of mine is note books. I'm constantly writing notes or jotting things down. We always browse down the note book aisle at the Dollarama... and of course, I get one pretty much every time. I almost have too many... but there is never "too many" in my world.

This is a great notebook cuz it's small and it will fit right in my smallest purse. I need to have an on the go book for those random thoughts that I get when I'm out... or if I remember I need something. Then there is the "dedicated notes" note book that we use to write each other quick back and forth notes! Cute I know.... but they aren't always lovey dovey... most of the time it's more like "clean this, or get this while you are out". haha okay, and back on track I go.

One of the good things about making these note pads is if you use a big enough cereal box... and your note books are a smaller size (like these ones) you can usually get a couple note books out of one box. So make a few while you are at it! Keep them for yourself, or give them away to your friends as gifts, they really are quite cute once they are done... and they don't take too long to finish either!


Materials you will need:
Cereal or Oatmeal Box
Ruler
Paper (white or lined, whichever you prefer)
Pencil
Button
Needle & Embroidery Thread or Thread (I like thicker for this, you can see it better)
Glue
Scissors
Decorative Paper

What you do:
Take your cereal box and cut it so it's flat. Use your ruler and measure out the size of the note book. I did mine 8.5" by 6", but you can do yours whatever size you like, whether it's smaller, or bigger. If you are using a big cereal box, you can get two or three note books, so you might as well do a couple while you are at it! Once you are done, cut out your piece(s).


Fold your cut out in half so the blank cardboard is outward.


Next, sew your button about halfway down on the edge of the front of your note book. Make your thread longer so you can use it to wrap around and close your note book.


Trace the outline of your note book on to a piece of paper and glue it on the inside of your notebook to cover up the cereal packaging. You can use plain white paper if you like. I decided to use coloured paper since I was using blank white paper for the inside already... I wanted some colour in there to brighten up my day! :)


Take the paper that you are filling your note book up with and cut it so it's a little bit smaller than the outline of your book. If you want, you can glue the bottom and top sheets to the note book, but you don't have too.


Now, take your embroidery thread and needle and stitch the paper to your note book down the centre spine. And don't worry about the mess on the back, we are going to cover it anyway with the spine!!


Cut out a sheet of decorative paper to go on the front and back spine of your note book. Glue it on with glue (just a tip, glue both the cardboard and the paper, it sticks MUCH better that way).


Yay! Finished!! Now you got yourself a cute new notebook to take to work or class... or if you are like me, in your purse, by your bed, in the bathroom... lol, you never know where or when you are going to think of something that you don't want to forget!!!


Check back for more cool things to make out of recycled goods!!

xOx - L

Click here to Like Designs & Decor on a Dime on Facebook.

Monday, 16 July 2012

Make a Mat out of Recycled Milk Bags!


A big thanks to my man's Mom for this one. She's been busy making mats out of milk bags for the last couple years now. It's a great time waster while watching t.v. or sitting outside, you don't really have to think about what you are doing! lol

So, she made one for us last year and I decided I so badly wanted to try to make one... especially since they were apparently oh so easy and any basic crocheter would be able to do it! Awesome, cuz I haven't crocheted in years!

What you need:
Milk Bags, Cut into one big long strip (Quite a lot, so start saving) *See Note Below*
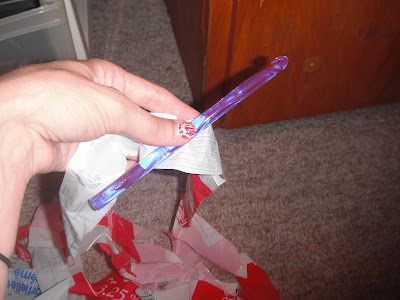
Big Crochet Hook
Scissors


Note: We got our milk bags cut because there is a church that gets them donated for Milk Bag projects for Haiti. There is a cool way to cut them so that your milk bag comes out in one long strip. I have not had to figure that out yet. When we do, we will post it here. If you know or figure it out, please, let me know!! I believe you fold your bag so it looks like it's in strips and you cut diagonal lines? But don't quote me on that... Okay, this is really bugging me now, I sense a project coming up!


I have seen others just cut the bags in strips and tightly knot them together making one long strip. You can do it with a lot of short strips too, it would just be more knotting or linking the strips in to your mat.


What you do:

Note: Depending on how big of a mat you want to make, depends how many chains you are going to crochet. But here is a quick guide to help get you started.


20"x30" Mat - Starting Chain 23 - About 9 inches

18"x27" Mat - Starting Chain 20 - About 8 inches

To Start:
Using 2 strips of milk bag (only for the 1st time, you will always only use 1 strip afterwards), start your chain of 23 (or 20). Turn on 2nd chain from hook and single crochet around the chain, increasing twice at each end. Continue to single crochet around, increasing only at ends and as required to keep rug flat. You don't have to increase at every end every time. Only when the mat starts to fold inwards. If the rug begins to turn up, it is because it requires more frequent increasing at ends. Be sure not to increase at the same point every time, it will form an undesirable pattern. Work a slip stitch over the last row for improved edge.

I hope you understood that... I think that was my very first time explaining crocheting! lol

You can keep going as big as you like. Sometimes I get lost in it while watching t.v and I just keep going and going and going, lol. Once you are done, put it outside on your balcony, or in your kitchen. Kev uses his to sit on while he goes fishing! They are awesome!


Mom came over and she was like... Linds, is that made out of milk bags? Sure is Mom! She loved it! She liked it so much, I made her one! And now she wants to make one! Well, here you go Mom! .... Since I still haven't got the pattern to you! LOL

xox - L

Click here to Like Designs & Decor on a Dime on Facebook.

DIY: Hot Tank - The 3 Braid Back


If you don't have any old shirts to use... Go raid the hubby's closet for this one ladies! Cuz this one is a hot one!! This 3 Braided Back Racer Tee is perfect for a bathing suit cover up for when you are at the beach! It also makes a nice shirt, although you have to get it the right size. My man is too big, so his clothes always end up being cover ups... for this t-shirt to be nice and form fitting you would want to go a size bigger than what you are.

You don't need a sewing machine for this sexy shirt either! You will be out and wearing it and looking good in no time at all!

What you need:
V- Neck T-Shirt
Scissors
Needle & Thread (that match shirt)
Marking Tool (chalk, pencil, marker, etc)

What you do:
Cut off both sleeves of the shirt. Draw the line you want to cut on the shirt if you don't feel comfortable free hand cutting. You are going to want to end (or start) whichever way you cut, right beside the collar line. See picture below.


Turn your shirt over so the front is facing down and you are working on the back of the shirt. Cut the collar so it's only attached at the front and the back is free. I accidentally cut mine off (as you can see from the picture below), but I can just stitch it on, no biggie, I'm just a clutz and sometimes don't think when I am doing things. LOL.


Cut two strips down the back, this will create three equal  strips down the back of your shirt. (I folded the front of the shirt down so it was easier for you guys to see what I mean). If you want more of your back to show, cut out bigger chunks of fabric (that's what I did).


Right on, now we are ready to braid. I work in sections for this part cutting one strip in to three at a time... this way you don't have 9 strips of fabric and it's less confusing working with just the 3.

Take your first strip and cut it in to 3 strips. Tug on the strips causing them to stretch and curl up and start to braid. Repeat for other 2 strips.

Once you have your three braids, stitch them to the underside of the collar. Trim off the excess material and you are ready to rock this top!


Don't mind the mess! LOL. A little big, but like I said before, if it's too big for you as a shirt, wear it as a beach cover up!!! I like it big, it looks cute with a pair of stretchies! Next time, I'd do this with a medium not an XL, hehe.

xOx - L

Click here to Like Designs & Decor on a Dime on Facebook.

Friday, 13 July 2012

Shirt Reconstruction... Inspiration for your Imagination!


That old shirt your going to throw out... think again! At least I do. Now every time I go to throw something out or give it away I think, will I need this for material or would I wear it if it looked different... Probably, give it a go. I mean if the shirt doesn't turn out, it's okay, it was going in the garbagio anyway!

There are so many different things you can do with your shirts to make them look different and kick ass! So let's take a look at some of my favs! For some, you don't even need to sew! LOVE IT... cuz I'm really not the best with the sewing machine... yet anyway. One day, I will master the technique, I just haven't had the time to actually sit down and get to know the thing yet!


Love this shirt above!! This shirt here involves no sewing.. just shears/scissors, some weaving and some tugging! And a hell of a lot of patience! Definitely would be nice for a day like today. It's so hot you just wanna sit here in your underwear... thank gosh for A/C, I don't know where I'd be without it this week!! I'm definitely going to try to do this shirt sometime this week! We will see if I succeed in making it similar to this one!


This DIY Workout Shirt is super easy... and you will look super cute working out!! If you don't have an old over sized shirt, go steal an old one from your man, your brothers or your kids. All you need is a shirt and a pair of scissors for this hot tank!

For the full DIY tutorial for this shirt, click here. 


This again, is no sew, just cutting and weaving!!! This is definitely for an experienced cutter and weaver. I'm not quite there yet. Maybe when the shirts are out of style I'll be a pro! LOL.  It's hard to explain weaving in a tutorial, but there are lots of tutorials on youtube for weaving shirts... cutting too, that's where I learned. You tube is AWESOME!! lol.

Anything you wanna do, you can find how to do it there!!


I'm currently making this braided back shirt! I started it before I went away on holidays, didn't finish it yet, but I plan on doing that soon. And with the finished product comes a step by step! So, if you like it, stay tuned within the next coming week for the know how! And if you want to wear it like... this weekend, search the internet, I'm sure you will find something!!!


Well, these bracelets aren't shirts... but they are made out of out shirts!! Awesome!! You can use as many colours as you like... or as many t-shirts! Maybe your shirt is already multi-coloured... that might be cool too!


This shirt would be nice for those cool summer evenings. I think it's super cute! Who's up for this challenge??

Anyways, I hope some of you, like me, make new clothes out of old clothes!! I love when someone asks where'd ya get that shirt? And you get the pleasure of saying I made it! :) Nothing makes my day more!

xOx - L

Click here to Like Designs & Decor on a Dime on Facebook.

Thursday, 12 July 2012

DIY: Embroided Card - Uniquely Different!

Cards! I ALWAYS love making my own. It's soo soo sooo much more personal. It gives the card so much more meaning. It shows you put time and effort in to making something cute for your friend or loved one! No matter what the occasion, there is a card to make!  What's on the inside in the scripture is whats most important. It doesn't matter if the card looks good or looks like it was from the store. It's perfect because it's made with love and with your own two hands!

I usually scrapbook my cards and my family loves it! This year... I'm thinking of trying this. It's nothing new. It's been around for ages. I used to cross stitch all the time. Well... I think I'm going to slowly get back in to it. As I was stitching this card tonight, I realized that I missed it... I think that's going to be one of my nightly t.v projects that I love so much.

Anyways, you probably have seen this before... but I think it's adorable!! Embroidered cards! How sweet!!
I made this in probably maximum 15 minutes tonight!

Grab your embroidery thread, card (or paper to make a card), pencil, scissors and a needle.


If you don't feel comfortable free handing your stitching (which I totally didn't... yet!), draw your pattern on your card with a pencil in little ticks, the ticks will be your stitch.


Look carefully above... you can see the pencil marks are there!! lol

Once you have your design drawn, get out your embroidery thread and needle and start stitching (from the inside of the card to the outside)!


Mix up your colours! Draw pictures or a saying! Whatever you do, I'm sure it will be beautiful and your friend will adore it!! I hope my love did!!


I'm not the best or anything... but this was my first time stitching for a long time... and my first time stitching from my own pattern! LOL.

xOx - L

Click here to Like Designs & Decor on a Dime on Facebook.

Wednesday, 27 June 2012

DIY: Fabric Clutch


Was roaming the internet late last night and saw this clutch purse! Super cute!! Love clutches!! They are just so easy to grab to head out for the day! And you can do this if you really aren't that great of a sewer, it looks pretty basic!

Here's what you will need:
  • Decorative fabric for outside of clutch
  • Fabric for lining
  • Heavyweight fusible stabilizer
  • Fusible fleece
  • Rotary cutter
  • Grid ruler
  • Iron
  • Sewing machine
  • Coordinating machine-sewing thread
  • Transparent tape
  • Bond 527 Multi-Purpose Cement
  • Metal clutch frame hardware
And the how to:
1. Cut 13-by-13 1/2-inch pieces from outer fabric, lining fabric, and heavyweight fusible stabilizer. Cut a 10 1/2-by-13-inch piece of fusible fleece. With an iron, fuse heavyweight stabilizer to wrong side of outer fabric, then fuse fleece to center of stabilized side of fabric.
2. With right sides of outer and lining fabrics together, sew 1/2-inch seams along both longer 13 1/2-inch edges.
3. Turn sewn pieces so right sides are facing out, and press seams flat.
4. Fold in half, matching seams at top, with lining on inside. Sew a 1/4-inch seam on outside raw edges, then trim seam allowances to 1/8 inch and snip in at the corners. Turn again, so outside fabric is on the inside. Sew 1/4-inch seam along edges, creating a finished French seam, then turn right side out.
5. Fold corners down; mark and sew a 2-inch gusset on each. Trim corner to 1/8 inch. Turn again so lining faces out; sew a 1/4-inch seam along gussets to finish seams. Turn right side out one last time.
6. Apply a bead of fabric glue to metal frame. Center over top seam, carefully insert fabric in metal frame, and secure in place with tape. Allow glue to set for several hours.
7. Remove tape, tuck outside corners behind frame, and snap closed.

Remember: I got this off of Martha's website, saw it and just had to share with you all... sometimes there really is cute things to make on there... sometimes! lol

Click here to Like Designs & Decor on a Dime on Facebook.

Thursday, 21 June 2012

Back Bow Shirt or Dress


I love DIY clothes!! With summer comes cooler clothes... and that means storing your winters.. which I'm sure many of you have!... But if you have any old t-shirts or one that you just want to change up... this is such a cute idea!! An open back bow!! I did mine quick, you can pay a little more attention to the cutting for a more professional look!

Here's what you will need:
T-shirt or a Dress
Scissors
Sewing Needle & Thread
Pen or Marker


Here's what you will do:
Take your shirt and turn it inside out laying it face down on a flat surface. Mark where you want your cut to be in the back of your shirt with a pen so the cuts are straight and neat! You want to make your cut a couple inches down from the top, I would say anywhere from 2 to 4 inches from the top of the collar line and about half of the shirt long (make it however you desire).


Start to cut out your piece in the back of your shirt. You are going to want to keep a strip of fabric from that piece for your tie for the bow.


You are going to take your needle and thread and starting at bottom center of the flap, where the bow is going to go, loosely hand stitch to top of flap, leaving spaces between stitches. Once at the top of the shirt, pull thread tight. This will create a bow look when fabric bunches up!  Wrap the thread around flap in center of bow once, and push the needle straight through from the top to the bottom of the bow (as shown below)


Take the strip that you cut for the tie and wrap it around the bow. Hand stitch the fabric tie so it's secure in place.


Turn your shirt right side out and this project is complete! You might want to mess around with the bow to make it just the way you want it! People will ask... where'd you get your shirt... I made it, silly!!

Click here to Like Designs & Decor on a Dime on Facebook.

Tuesday, 19 June 2012

Beach Cover Ups... For Everything!


The beach is usually a big part of my summer, and I'm sure it is for you too! Even though it's the beach and you probably shouldn't bring your Ipod, phone, magazines or even your laptop, you do anyways... just in case!

Well these are perfect! Beach Cover Ups!!! Not for you silly, for your stuff!! Saw these on Martha's GREAT website and thought I had to share! Stitch pouches in just the sizes you need to protect your gear! Start by choosing from a bunch of different mod oilcloth patterns. You can get summer-ish looking fabric from a fabric store or you can use something you have around the house. I used old curtains when I made mine!

Here's what you do:

Cut a rectangle of oilcloth as wide as the object you want to hold, plus 1/2 inch for seams, and 2 1/4 times its height (for a horizontal pouch, flip these dimensions). Fold to form a pocket shape with right side facing outward, stitch up the edges, and then add self-adhesive Velcro fasteners to secure. Easy as pie!

Click here to Like Designs & Decor on a Dime on Facebook.

Droopy Ear Sock Bunny

I was browsing through one of my favorite websites yesterday and came across this cute Droopy Ear Sock Bunny and thought it was super adorable! I think it would be perfect for my niece. I have to make this!! I'm sure I have everything I need here at home too!! Perfect!!

The bunny can sit on it's own, making it perfect for decoration or a gift for a little loved one to snuggle with! I believe this bunny is a little bit advanced, so if this is your first "sock bunny" you might want to try a little simpler pattern (which I will provide link below).

The materials needed for the Droopy Ear Sock Bunny are as follows:
1. Sock (crew length, with folded cuff or with long cuff)
2. Buttons (as eye) 3/8″ [10mm], black, 2
3. Embroidery Floss, Pink
4. Ribbon / Lace, Pink, and some embellishments
5. Poly-fill stuffing material

And the following are the tools you will need:
1. Sewing machine
2. Sewing needle (prefer long) and pins
3. Scissors
4. Erasable fabric marker
5. Iron

I hope you all enjoy making this as much as I am going too! Please, share with me after you have made one!! I'd be delighted to hear how it went.

Click here for instructions on how to make the Droopy Ear Sock Bunny
(Complete details are found on page 2 of this link)

Click here if this is your first time and you want to try a simpler more detailed pattern. 

Below is a picture of the easier sock bunny with the much more detailed pattern. Both are so cute!! Why not try the easy one first and have it perfected for the second!!!


Click here to Like Designs & Decor on a Dime on Facebook.